Salad recipes for lunch

Salad recipes for lunch


Salad recipes for lunch


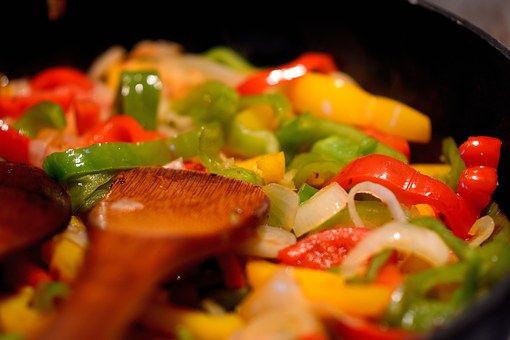
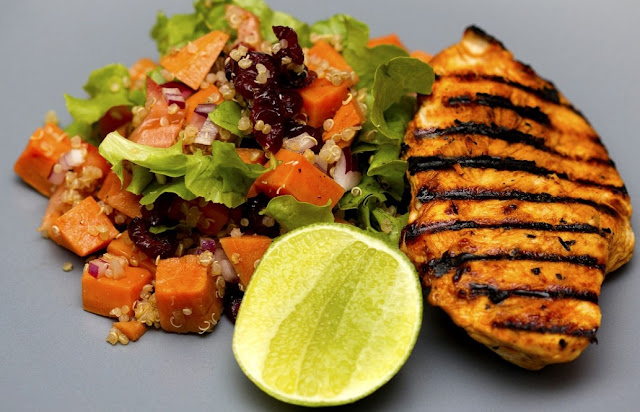
Salad recipes for lunch, which is the first step of a healthy diet; It is offered with both meat and vegetable products. How about coloring your tables with salad varieties presented in different parts of the world? It is possible to have a light and balanced diet with salad recipes, which have become indispensable for diet lists. You can consume salad varieties with rich nutritional values ​​in between meals or main meals.

             Ingredients

  • 1 cup black quinoa
  • 1 small purple cabbage
  • 1 red onion
  • A few sprigs of parsley
  • A few sprigs of dill
  • 1 small bowl of walnut
  • 1 piece of chicken breast (Boiled and stewed)
  • For the sauce
  • 3 tablespoons of olive oil
  • 1 teaspoon of balsamic vinegar
  • 1 teaspoon pomegranate molasses

      Method

How to make winter salad with chicken
Boil the quinoa.
After peeling the red onion and chopping it as a dice, rub it with salt and remove the brackish water. Chop the greens. Chop the walnuts into the size of chickpeas at the most. Mix all the salad ingredients in a deep bowl.

Transfer all the ingredients to a small jar for the sauce. Cover the jar, shake the mixture well, and place it on the salad and mix.


Tasty recipe for kids cannelloni recipe

  Tasty recipe for kids cannelloni recipe
  A tasty recipe for kids cannelloni recipe


         Tasty recipe for kids cannelloni recipe

      A tasty recipe for kids' cannelloni recipe. A recipe with plenty of vegetables. friends this is an easy and children friendly recipe. My dear son thinks I actually make this recipe too little. Well, if this is not kid-proof then I don't know it anymore.

        INGREDIENTS

  • A dash of olive oil
  • 3 cloves of garlic, finely chopped
  • 2 cans of tomatoes, of 400 grams of good quality, eg Cirio
  • one full hand basil leaves (leaves separated from the stalks. Tear leaves finely and chops the stalks)
  • 600 grams of fresh spinach
  • A bowl of ricotta (250 grams)
  • 80 grams of pecorino (or parmesan) cheese, grated
  • 200 grams of crème Fraiche
  • 50 ml of water
  • 1 pack of chilled lasagna (12 sheets)

       Method

Preheat the oven to 180 degrees.
The sauce:
Put olive oil in a pan.
Add 1.5 cloves of finely chopped garlic, basil stalks and fry briefly.
Add the tomatoes and let it reduce to a thicker sauce.
Season with fresh pepper and salt and stir in the basil leaves.
The filling:
Put a dash of olive oil in a wok or large frying pan.
Add the remaining garlic and stir-fry the spinach. Drain.
Put the ricotta in a bowl and stir in the spinach.
Season with fresh pepper and salt.
The cannelloni:
Spoon about half of the tomato sauce over the bottom of a baking dish.
Cover all lasagna sheets with a strip of spinach-ricotta filling.
Roll the lasagne sheets and place them tightly next to each other in the baking dish.
Spoon the remaining tomato sauce over it.
In a bowl, stir the crème Fraiche smooth with half the pecorino.
Dilute with a little water to the desired thickness for the sauce.
You use approximately 50 ml of water for this.
Season with fresh pepper and salt and spread evenly over the tomato sauce.
Sprinkle with the rest of the cheese and bake the cannelloni until golden brown in about 25 minutes.
Enjoy!

       TIPS

With very small children it can be useful to first puree the spinach. Sometimes it is eaten better.

To make it extra easy, this vegetarian cannelloni recipe has also been made into a video recipe. You can view this here!

Prefer to make a cannelloni with meat? This with minced meat is a must!

Have you made this recipe? Then let me know how it went. 


How to prepare Ginger tea and its benefits


How to prepare Ginger tea

How to prepare Ginger tea and its benefits


How to prepare ginger tea. Ginger has several therapeutic benefits, including a bactericidal, fungicidal, antioxidant, antiseptic and anti-inflammatory action. Ginger tea can be beneficial, in small amounts, to relieve nausea (including during pregnancy or chemotherapy), to aid digestion and to fight throat and respiratory diseases.

It also helps to prevent gastritis and ulcers, as it acts to fight the H. pylori bacteria, one of the main causes of the problem.

Ginger is known to be a thermogenic food, that is, it speeds up metabolism, increases body temperature and can help those who want to lose weight, but this benefit will only be noticed if combined with a healthy diet and physical exercise.


Ginger is found in fresh markets, preserves, in capsule, crystal or powder form. To make tea, it is best to use pure root. When buying, prefer it whole and fresh, with smoother skin, without holes, that is not withered or moldy. The inner part must be yellowish and not too fibrous.
What nutrients do you have?
Ginger is rich in copper, vitamins A, B, C and D, potassium, selenium, zinc, and magnesium. In the case of ginger tea, specifically, the benefits are also closely related to the release of the essential oils that are part of its composition: thymol, carvacrol, and eugenol.

These oils are mainly responsible for the anti-inflammatory action of ginger tea. That is, our body produces several inflammatory substances, such as oxytocins, but the essential oils of ginger can help inhibit inflammation. There are even animal studies that show its benefits for reducing joint inflammation related to arthritis.

For the stomach, mainly, studies show that it affects the adherence of the bacteria H. Pylori, which decreases the risk of developing gastritis, ulcers, and even stomach cancer in those who ingest it more frequently.

Note that the table of nutritional values below considers 100 grams of ginger, however, daily use cannot exceed 3 grams.
Benefits of ginger tea

Help with weight loss:


   Ginger tea is an ally for those who want to lose weight, since it is a thermogenic food, that is, it speeds up metabolism increases body temperature and ends up helping to lose weight. However, it is not enough to just drink ginger tea and expect significantly weight loss, its benefits will only be noticed if combined with a healthy diet and physical exercise.

It reduces nausea: Some studies have shown that ginger tea can help to reduce nausea after eating. When food does not "fall" well, it helps to decrease this feeling of poor digestion. However, if the cause of this nausea is a tumor, for example, it will not have this effect. By helping with digestion, its use is also related to the relief of gas symptoms.

It can also be used to reduce nausea in people undergoing chemotherapy or pregnant women, for example, but it is important to always talk to your doctor before starting to use tea in these situations.

Prevents ulcers and gastritis: As ginger tea helps fight H. pylori bacteria, one of the main causes of gastritis and stomach ulcers, it also helps to prevent diseases from happening. This mechanism happens as follows: the bacteria enter the human body through food and are fixed in the stomach, causing gastritis and ulcers. However, tea would decrease its adherence to the stomach, making it difficult for it to stick and to cause disease.

It can help in the prevention of cancers: Among the cancers that studies show that ginger and its tea can help prevent is stomach cancer, since it is related, in most cases, to changes caused by stomach ulcers. It also acts in the prevention of colon-rectal cancer, as it has a substance called 6-gingerol, which would prevent the development and proliferation of cancer cells in this region of the intestine. Animal studies also show a decreased risk of developing liver cancer.
Prevention of respiratory diseases: As ginger tea has an antioxidant action in the body, it acts in the prevention of flu and cold. It also has anti-inflammatory action, improving symptoms of cough and muscle pain and diseases such as asthma and bronchitis.

How to prepare ginger tea

In order for ginger tea to maintain its benefits, it is important not to boil the root with water. Tea should be prepared as follows:

Wash the ginger root thoroughly
Cut into small pieces or grate the root
Meanwhile, bring the water to high heat until it boils
Add the ginger to the water and cover the pan, lowering the heat slightly
Wait for 5 to 10 minutes to remove from the fire
Strain and serve.

How to consume ginger tea

The person should not consume more than three grams of ginger a day. These three grams can be divided into three or four cups of tea throughout the day, for example. But always be careful, since too much ginger tea can cause stomach irritation.
How to cook French fries step by step

how-to-cook-french-fries

                                            How to cook French fries


                            How to cook French fries


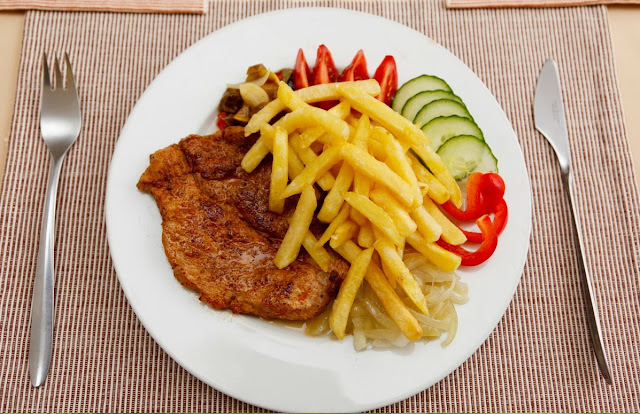
       How to cook French fries at your home. You know friends there are infinite possibilities for the use of potatoes, surely the most delicious one is frying. We will show you the most classic one which provides potatoes cut into sticks. But the cuts are many and you can choose them according to the occasion. For example, to prepare the chips cut the peeled potatoes with a special wide blade grater set on the thinner thickness from which almost transparent slices are obtained.so read the whole recipe for this tasteful French fries.

 Ingredients for Crispy French Fries Recipe

·        Roast potatoes as much as you want
·        Oil to taste
·        Salt to taste

   Method

Cooking French Fries Recipe
Wash the potatoes under water, peel them and chop them.
Soak in water for 1 hour, stirring occasionally so that the starches come out.
Put the oil on your ceiling and heat it.
Strain the potatoes in a strainer and dry them with paper or kitchen towels.
Throw the potatoes in hot oil, after 5-6 minutes, remove the potatoes from the oil.
Let it stand on one side after the potatoes wait for 5-10 minutes, then turn the oil on the stove, add the salt to the oil, close to the browning.
When it comes to the desired consistency, remove it from the oil.
In this way, if you fry your potato, it will be crispy on the outside and soft on the inside.

I fried the potatoes in 2 ways, the yellow and yellow ones, as I described.
On the other plate are those that are fried without being taken out of normal oil.
I wanted to see the difference.

The choice is yours.

How to make French fries, who have not tried to make it at home before? If you are wondering, you can examine this recipe and try it at home.
What are the tips of the French fries’ recipe?
After slicing your potatoes, you should wait in the water to remove starch and not tarnish.
The oil that you will fry your potatoes should be angry.
Before you throw your potatoes into the hot oil, you should definitely dry them. If the water drips into the oil, your oil will burst and splash.
Baked French fries recipe;
Baked potato chips are a very suitable recipe for those who do not want to fry in large quantities. If you do not want to fry in the pan, you should try this method.
What goes to fries?
Meatballs will suit the most with the fries.
You can accompany the French fries with vegetables such as pepper.
It is very suitable for frying in pasta with sauce or baked pasta.
You can accompany the French fries with ketchup mayonnaise or a nice yogurt sauce.
How many calories are French fries?
1 medium portion of French fries corresponds to approximately 250 calories.

Tasty recipe for chicken


Tasty recipe for chicken
A tasty recipe for chicken


                   A tasty recipe for chicken

         Tasty recipe for chicken. Yes, dear friends. Chicken dishes that are popular in the world are suitable for every taste with their practical, nutritious and delicious flavors. Chicken recipes that can be easily prepared with the ingredients at home; It covers a large part of both the economic budget and healthy life.
Get ready to explore new tastes with the favorite recipes and go on the flavor journey with the most favorite recipes

Ingredients for Baked Chicken Recipe

  • 3 chicken breasts
  • 2 zucchini
  • 2 carrots
  • 10 cherry tomatoes
  • 10 pomegranate onions
  • 2 potatoes
  • 1 tea glass olive oil
  • 1 teaspoon black pepper
  • 3 cloves of garlic
  • 1 teaspoon ore
  • 100 grams of cheese
  • 1.5 tea glasses of water

Method for Baked Chicken Recipe


Make sure all the vegetables are fresh and get help from different spices to increase its flavor. The secret is to add the cheddar cheese at the last stage. If you add it in the first stage, it melts in cheddar cheese, it starts to harden and the taste is not what you expected. If you want the cheddar cheese to melt more nicely on your food, throw your grated cheddar cheese into the freezer. At the last stage, add it to your food and melt it gently. They will both be tastier and more deliciously melted.

Cooking Recommendation of Baked Chicken Recipe

If you wish, you can cook your food for a longer time at a lower temperature.
How to Make Baked Chicken Recipe?
Peel the skin of the potatoes and carrots and cut into cubes.
Chop the courgettes into thick cubes without peeling them.
Peel the shallots, remove the green stems of cherry tomatoes
Chop the chicken breasts into cubes.

Transfer all of them into glassware or ceramic ovenware. Put olive oil, salt, pepper, garlic, and thyme on it. Blend beautifully with your hands.
Add the water and cook it for 180 minutes at 180 degrees by covering it with aluminum foil or the lid of your container, if available.
Know cover and cook it for at least 6 minutes.
Take it out of the oven and sprinkle the grated cheddar cheese on it and cook again until the cheese melts and brownies.
Take it out of the oven and consume it warm.

If you want to prepare your guests unforgettable dinners, pamper yourself and consume low-calorie foods, you can find the best chicken dishes, practical cooking techniques and more here.

Easy recipe vanilla cake

easy-recipe-vanilla-cake
Easy recipe vanilla cake
     Easy recipe vanilla cake

 Vanilla cake a super-soft cake, easy to prepare and perfect for breakfast or for the whole family's snack. Do you know those cakes that I often enjoy making without this or without that? Here's forget it because this cake has everything it needs to have. I wanted to prepare a soft and very high cake to try to change the breakfast of our house where we all drink coffee in a rush eating maybe a biscuit or two and little else but it shouldn't have been too messy and I had to make it last at least a couple of days because we're out of everything the day and only at breakfast any cake would become dry. Well, do you want to know? I didn't have time to prepare it for Bugi which in a few minutes was already half a cake and after two hours it was finished. Oh well, we'll go back to cookies for tomorrow but I'll have to make another one very soon and I hope this time to be able to take it home! 

   Ingredients

  1. 250 g 00 flour
  2. 180 g sugar
  3. 180 g Butter
  4. 3 eggs
  5. 1 sachet Baking powder
  6. 1 vanilla bean

     Method

Divide the yolks from the whites.
Beat the egg whites until stiff steaks
Melt the butter and keep it aside.
 Put the yolks in a bowl together with the sugar and whip them with the electric whisk until they become frothy and whitish. Cut the vanilla pod with the tip of a small knife and extract the internal seeds. (keep the vanilla pod to flavor the milk for the PASTRY CREAM). Add the melted and cooled butter and continue to beat with the electric whisk for a few minutes.   Sift the flour and baking powder and add them to the rest of the ingredients. Finally, also, add the egg whites whipped with gentle movements and from the bottom up using a spatula. Pour the vanilla cake dough into a greased and floured or greased cake tin or with grease proof paper or with the release agent for baking pans and level the surface well.   Bake the vanilla cake in a preheated oven at 180 ° for 45 minutes until the cake is completely cooked and you have made the toothpick test. Remove the vanilla cake from the oven and let it cool completely. Once the cake is completely cold, you can sprinkle it with SAUCE SUGAR.   

VARIANTS AND ADVICE

 You can replace the butter with oil in the doses that you will find HERE. If you do not have the vanilla bean, you can replace it with a sachet of vanilla or a teaspoon of vanilla extract. 


      Storage


The vanilla cake is kept soft for two days covered with plastic wrap.


If you liked this recipe, you might also be interested in the Chocolate Cake or the birthday cake 


Easy recipe Mexican rice


easy-recipe-mexican-rice
Easy recipe Mexican rice


   Easy recipe Mexican rice

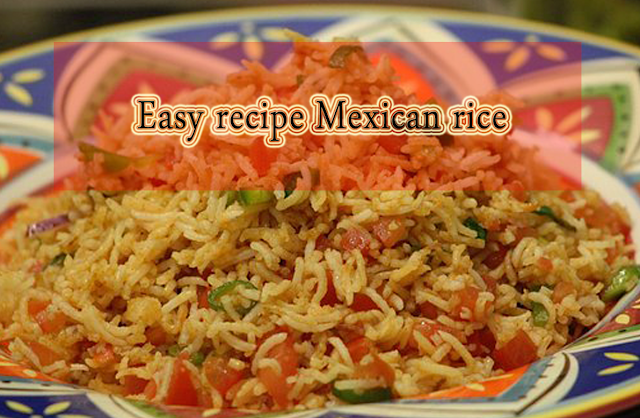
      Easy recipe Mexican rice is a popular side dish in Mexico combined with a staple and beans. You can make in different ways and we tell you the most popular one method and guide you step by step. Try to match the rice ingredients with what you make as the main dish. If you're serving chicken, Easy Mexican rice is perfect. If you serve beef, try Roasted Tomato Mexican Pilaf, prepared with steak juice.
An easy-to-make, spicy, delicious pilaf. For those who are looking for new flavors.
For more information about Mexican Rice please see Mexican Rice History.

      Ingredients
  • 1 tablespoon of olive oil
  • 1 spring onion finely chopped
  • 1 jalapeno pepper stalk is cut and the seeds are removed and thinly sliced
  • 2 cloves of garlic diced
  • 2 tablespoons of tomato paste
  • 1.5 cups long grain rice
  • 3 1/3 cups chicken broth (alternatively you can use vegetable broth) with little salt
  • 1 teaspoon salt
  • 1/4 teaspoon ground black pepper
  • 1/2 teaspoon chili pepper
  • 1/2 teaspoon powder cumin
  • 1/2 cup frozen peas thawed
  • 1/4 cup fresh coriander finely chopped
  • 2 teaspoons of lime (lime juice) freshly squeezed
  •  

       Method

1.   In a large frying pan or heat the rice pan and add olive oil. Heat it over medium-low heat.
2.   Add onion and jalapeno and cook, stirring constantly. You will cook for about 5 minutes until the onions soften and become transparent.
3.   Bring the bottom of the stove from the middle cut to medium temperature and add tomato paste, garlic, and rice. Know to cook it for three minutes.
4.   Add chicken broth, salt, pepper, chili pepper, and cumin; Bring the setting of the stove high and wait for it to boil.
5.   When it starts to boil, cut the bottom of the stove and close the lid of the pot. Allow it to cook inside for about 20 minutes until it draws the water.
6.   Add the peas, coriander and lime juice and mix well with rice, the final mixture is fluffy. Wait for a few minutes to drain the rice juice. It should have a steamed baked appearance. Taste the food and add salt, pepper and lime water if necessary.


        Key point

The amount of water may decrease or increase depending on the brand and type of rice you will use.


How to make tea with milk easy and step by step

How-to-make-tea-with-milk-easy-and-step


How to make tea with milk easy and step by step 


If you thought that milk and tea could only be drunk together in the English way, then we have a 
pleasant surprise for you. Many cultures like milky tea and there are different ways to enjoy the combination. We tell you what the three most popular ways are.

Just like with coffee, chai latte is made with steamed milk. Use black tea for a classic taste. Do you want something more special? Then try earl gray tea bags for a softer taste. This is how you make it:
Put a teabag of your choice in a cup.
Know to boil the water and pour it on that cup.
Let the tea brew for at least 5 minutes for the best taste.
While you are making tea, heat half a cup of milk for 45 seconds in the microwave (the time depends on the power of your microwave) or in a pan until the milk starts steaming.
Pour the hot milk into a cup and use a milk frother for an extra airy froth effect. The ideal foam layer is just over an inch thick.
Remove the teabag from your cup and pour the milk into your tea.
 Know a little honey for the taste to get a good taste.
They are probably not wrong, those 65 million Britons who think there is only one way to drink a "real" cup of tea - and they think that is with milk. Moreover, it is super easy. You only need a kettle, a cup and 5 minutes, and then you just follow these simple steps.

Put a bag of tea in your favorite cup.
Bring water to the boil and pour it over the teabag.
Let the tea brew for 3 to 5 minutes without stirring or squeezing the bag.
Remove the tea bag and add a cloud of milk. Note: the milk is meant to improve the taste, so you just have to add a dash to make the tea creamier. If you use too much milk, you will no longer taste the tea. Look at the color of the drink while pouring. The idea is that you get a uniform brown color - a very light brown color means that there is too much milk in it.
Stir the milk evenly through your tea with a spoon.


In both recipes, you can use soy or almond milk instead of cow's milk.


SWEET MILK TEA


Lemon slices and ice cubes are certainly not the only way to enjoy iced tea. Have you ever tasted sweet milk tea? With delicious creamy milk, it is the ideal treat on a warm summer's day.

Follow the first 3 steps from the previous British milk tea recipe, but use two tea bags for a stronger tea flavor.
Season the tea with a cloud of condensed milk. Note: condensed milk is very fast, so don't use it too much.
Fill a glass for half or three quarters with ice cubes or shaved ice.
Fill the glass with tea and enjoy it immediately.


One last tip ... Add a pinch of nutmeg or cinnamon to these recipes to give your drink a spicy hue.

How to cook chicken recipe with curry sauce

how-to-cook-chicken-recipe-with-curry
chicken recipe with curry sauce
     
      chicken recipe with curry sauce

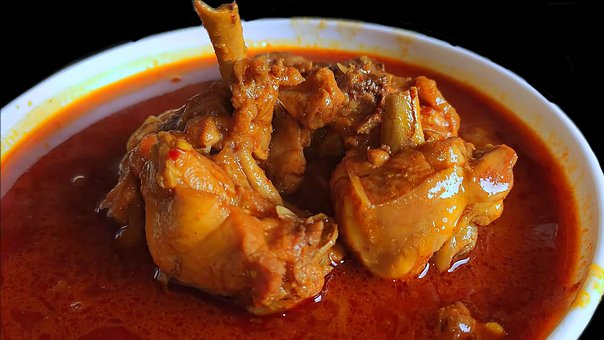
     Today, I will tell you the chicken recipe with curry sauce, which is widely made and loved by everyone, a little different. Although the materials may seem a bit much, the construction is very simple and short. With this recipe, you can surprise your guests with the taste of curry chicken in a slightly more fine dining style rather than a classic house type.
               

                  Ingredients
 

              Chicken             For curry sauce;

  1. 200 ml coconut milk or 4 tablespoons yogurt
  2. 1 tablespoon curry powder
  3. Half a lemon
  4. 1 tablespoon balsamic vinegar
  5. 1 tsp red pepper
  6. Salt

         Chicken for marinating;

  1. Red powdered pepper
  2. Powdered chicken bouillon
  3. Salt
  4. Black pepper
  5. 2 tablespoons yogurt
  6. 1 teaspoon of honey
  7. Quarter of lemon
  8. Mint
  9. Olive oil

       To decorate;

  1. Cherry tomatoes
  2. Basil

      For rice;

  1. 1 cup of Jasmine rice
  2. 2 glasses of chicken broth

    Method

First, we put our rice in warm water and wait for 10 minutes. After that, fry in oil and add hot chicken broth or bouillon and cook. It will be ready in about 10 minutes. When the rice comes out of the holes, our rice is ready and we take it from the stove and let it rest.

While we are relaxing, we will marinate our chickens and start frying them in the pan. Red pepper powder, powdered chicken bouillon, salt, and pepper in a bowl, mix well on the chicken. Do not use mold bouillon here will be lumpy. The powder is available in large markets and you can marinate red meat with it before cooking. Then fry our chickens thoroughly in the pan.

We'il make our curry sauce while the chickens are fried. For this, coconut milk, which you can find in canned food in big markets, will give a very nice aroma. If you can't find it, you can do it with yogurt. Add 200 ml of coconut milk, 2 tablespoons of curry powder, 1 teaspoon of red powder pepper, half a lemon juice and 1 spoon of balsamic vinegar salt and mix well in a bowl.

We take the curry sauce into a new pan and throw the cooked chickens into it, boil the sauce and let the chickens eat the sauce thoroughly and continue cooking until the sauce comes to consistency.

Finally, we cut the mint in a very small way for the sauce and mix all the ingredients and the sauce is ready. You can do this on a food processor, but first, we need to mix the ingredients except for mint and add the last mint, so that the mint doesn't break up.

Finally, as a bonus to decorate under the tomatoes in the form of plus 2 scratches in boiling water for 10 seconds and let cold water. Then peel the shells up and peel the light olive oil with basil if you get a nice decor. In fact, if you dry them in the oven a little bit if possible you will get much better results.

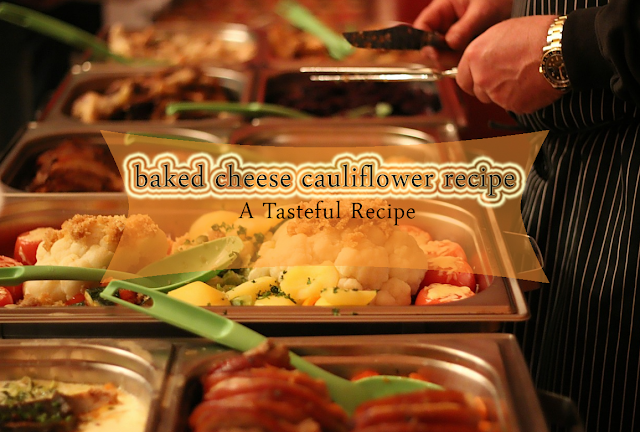
Baked cheese cauliflower recipe

baked-cheese-cauliflower-recipe
baked cheese cauliflower recipe


  Baked cheese cauliflower recipe

A recipe that even people who say 'I don't like cauliflower very much, but I eat it' with a completely different tastes. Baked cauliflower with cheese in the oven! It emerges from the state of tomato paste and ground beef, which we all are accustomed to, with a very different flavor.

It is food thrown in our hearts with the benefits, it provides rather than the cauliflower taste. It contains active ingredients that fight against stomach ailments, cancer, and dry eyes. It is possible to see these benefits when eaten enough. But it is always worth consulting a doctor, let's not forget this.

Today, we put aside the prejudices against cauliflower and enjoy this flavor. We left the video below, we wish you good luck

       Ingredients 

  1. 100 grams powdered parmesan
  2. 800 grams cauliflower(boiled)
  3. 6 slices mozzarella cheese
  4. 150 grams grated cheddar cheese
  5. 1 cup of cream
  6. 150 grams of melted butter
  7. 2 cloves of garlic(crushed)
  8. 8 sprigs of fresh thyme(chopped)
  9. 2 teaspoons of salt
  10. 1 teaspoon of black pepper

         Method

  1. Mix melted butter, chopped fresh thyme, garlic and 1 teaspoon of salt in a bowl.
  2. Put half the boiled cauliflower into the heat-resistant container.
  3. Take a scoop of sauce and sauce the cauliflower.
  4. Sprinkle with powdered parmesan, mozzarella cheese and grated cheddar cheese all over the cauliflower.
  5. Pour 2/3 of the cream into the mold.
  6. After adding the remaining cauliflowers to your heat-resistant container, sprinkle with the rest of the powdered parmesan and cheddar cheese.
  7. After pouring the rest of the cream into the mold, sprinkle it with fresh thyme leaves.
  8. Bake in a 180-degree oven for 25 minutes until the cheese melts and brown and serve hot.

How to make anchovy rice?


how-to-make-anchovy-rice
How to make anchovy rice

   How to make anchovy rice?
  
Hello to everyone! I'm here with a delicious recipe. Together, we will make anchovy rice.

Anchovy rice is an extremely tasty rice that is not as difficult as it seems. And I guess I don't know anyone who doesn't love him. If you make friends or something, everyone will want you to come home and cook!

In this recipe; first we start with the rice portion. While the rice is cooked, anchovies will slowly begin to set the pan.

Then we will meet the rice with anchovies in a baking dish and leave it to bake in the oven with a delicious pastry. When cooked; it will be a delicious meal with its smell, appearance and taste.

When your guests arrive, you can try my anchovy rice recipe if you want to prepare a meal that addresses both the eyes and the stomach. If you're ready, let's first take a look at the materials you need and then start making…

          Ingredients For rice

  1.  1 tablespoon butter
  2.  1 tablespoon olive oil
  3.  1 small onion                                                  
  4.  pine nuts
  5.  1 tablespoon of currants
  6.  allspice
  7.  1 cup of rice
  8.  1.5 glasses of water fresh dill

       Ingredients For anchovies

  1. 1 cup of corn flour
  2. 1 kg of anchovies

      Tip

If the dish you serve will be the same size as the cookware you cook, it will be much easier to turn it.

      Method

Take a pan of rice and open it underneath.
Take the butter and olive oil and add the finely chopped onion after the butter has melted.
Roast the onion until it turns color.
When the onion leaves itself, add the pine nuts and continue to roast.
Soak the bird grapes with hot water to soften, then strain the water and add it to the pot.
Add a little allspice and stir a little.
Wash long Baldo rice under cold water to get rid of excess starch and transfer it to the pot.
Roast rice with other ingredients.
Add salt and pepper and blend a little more.
Add the juice and mix everything again and let it boil.
When you see it boiling, turn it down, close the lid and cook for 8-10 minutes until it has drained.
After you see it cooked, open the lid and add fresh chopped dill and leave to infuse for 10-15 minutes.
Clean and wash anchovy.
Strain the water after washing.
Place a copper pot or ovenware on the counter.
Lubricate the gold to the edges along with olive oil.
Dip the anchovies in cornmeal and place the anchovies starting from the inside and rotating outwards.
When you have covered each side of the pan, then pass the edges again with anchovies to cover it.
After placing all of the anchovies, stir the infused rice well and leave over the anchovies.
Make sure to place the rice as high as possible.
Close the anchovies on the edge over the rice. This will make it stop all the more.
Continue placing the remaining anchovies with the skins on top and cover the rice.
Hover over some more olive oil. You can also apply a brush on anchovy.
Place the pan in the preheated oven at 180 degrees and cook for 20-25 minutes.
After removing from the oven, turn it to a service plate.
If your plate is the same size as the pot you use, it will be easier to turn.
Service Suggestion
Garnish with fresh onion and lemon slices and serve by slicing.

Which Fish How to Cook fish cooking method

which-fish-how-to-cook-fish-cooking
Which Fish How to Cook fish cooking method

Which Fish How to Cook fish cooking method

How to make fish? How to cook fish in the oven? How to fry fish? Here are the answers to your questions about how to cook fish.
Fish is a food that people of all ages should consume. There are many benefits of the fish that should be on the tables at least 2 days a week. The fish, which is rich in omega-3, is preferred with its protective effect against cardiovascular diseases as well as the benefit of intelligence development especially in children. It is also an important nutritional source in terms of weight control as the fat content in fish is low. Fish with so many benefits should be on the nutrition list of adults as well as children.

Sardine, mackerel, anchovies, morino, salmon, pike, herring and sea bass are rich in calcium. Fish rich in omega-3; known as mackerel, tuna, sardines, salmon, anchovies and bluefish.

The fish season is different for each fish. Fish consumed during the season and months are much more delicious. It is also important how the fish is cooked as much as it is consumed at the right time. For this, fish cooking methods and which fish, how to cook is also useful to know.
 
Which Fish, How to Cook?
The most important point when cooking fish is to be able to cook without killing the protein. The fish can be cooked by frying or cooked in the oven or grill. Saute, boiled and steamed cooking methods are also highly preferred.

Oven Cooking
Oven cooking is a very common method. The fish to be cooked in the oven, olive oil and lemon mixture for a few hours to wait for the finishing is useful. Thyme or bay leaves can also be added as desired. The fish is baked in an oven heated to 200 degrees and placed on a tray with olive oil. Sliced ​​acorn, toric and peppers, tomatoes, onions, lemon slices and baked with plenty of parsley will be quite delicious.


Grill Cooking
While cooking, it is useful to choose big and oily fish in order not to stick to the grill. While cooking, the two sides of the fish should be drawn with a knife to avoid cracking. Grill cooking will be a very healthy method when white or black meat fish are preferred when they are fatty. Fish can be prevented from sticking by lubricating with oil before they are put on the grill. If it is to be cooked in a barbecue, the fire should not be too rich and the fish should be cooked far enough away from the fire.

Frying
Large fish should be sliced ​​and small fish should be fried whole. If the fish is floured, it will not stick to the pan and will be much more delicious. Small awned fish, fillet-extracted fish or bone-sliced ​​fish can be cooked in this way. With this cooking method, it is possible to get a more delicious result when the fish is low-fat or when it is applied to non-fat fish. It is very important to note that the fish does not draw fat while frying in the pan. Fish should be fried in hot oil and fast fire.

Roast
It is the preferred cooking method in a high-temperature oven without adding anything to the fish.

Saute
A pan with thick soles and non-stick coating should be preferred. It is a method of cooking fish fillets by rotating each side for 2 minutes after the inside of the ceiling is lightly oiled and well heated.

steamed
Steamed, made mostly from white meat fish, is a method of cooking fish on low heat or in the oven with the addition of water or tomatoes.

Tips for cooking fish
The fish to be fried should be cleaned and washed thoroughly and dried with paper towels.
2-3 hours before the fish is cooked, the onion juice and olive oil is put on the fish and cooked will be much more delicious.
The fish can be divided into pieces and the bottle can be passed. So it will cook much faster.
When the fish is cooked in a high-temperature oven without adding anything, if it is cooked correctly, the outer surface of the fish will be crispy and delicious, while the interior will be juicy and cooked.
When cooking fish, lemon and parsley put into the cooking tray will add flavor to the fish with its aroma.
Although it is not preferred to cook fish at home, especially to fry with the idea that it will smell, there is a method. Burning lemon peel on the cooker or boil vinegar in a coffee pot will be the solution to this problem.

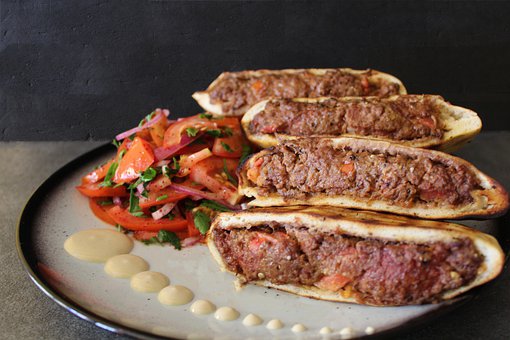
How to cook Delicious Turkish kabab the best method

how-to-cook-delicious-turkish-kabab
Delicious Turkish kabab

How to cook Delicious Turkish kabab the best method

If you are not from Manisa but you have once met the delicious taste of Manisa kebab, come closer. We know how long you've been wanting, but you can't eat.
It's time to do it with your own hands.

      Ingredients  


  1. 500 grams of meat
  2. 250 grams of lamb meat
  3. 3 tbsp gal flour
  4. 2 pieces dried onion
  5. 1,5 teaspoons
  6. 1 teaspoon black pepper
  7. 1 teaspoon cumin
  8. 1 piece of garlic
  9. 4 pieces of pita bread
  10. 1 sweet spoon butter
  11. 1 tablespoon of tomato paste
  12. 1 sweet spoon pepper paste
  13. 4 tablespoons
  14. 4 pieces of yogurt
  15. 4 pieces


Tip of Manisa Kebab Recipe

Kneading the meat for a long time and then resting will help you get more delicious meatballs.

     Method

You can cook your meatballs on the wire shelf of the oven and serve them with Ramadan pita.

How to Make Manisa Kebabı Recipe?
Sprinkle the onion and beat the garlic in the air.

Knead the ground beef with onion, garlic, breadcrumbs, and spices for at least 10 minutes.

Prepare the meatballs in thin, long strips with your hand and place them on a tray.

Let the meat rest in the refrigerator for 30-35 minutes to taste.

Cook the tasted meat at high temperatures in a well-heated cast iron pan. If you wish, you can add pepper and tomatoes at this stage.

Cook the tomato and pepper paste with water. Add the melted butter into it and remove it from the stove when it boils.

Heat the pita bread in a light buttery pan.

Apply a thin layer of yogurt with a knife. Pour the tomato paste sauce over the yogurt and place the meat. That's it, bon appetit!

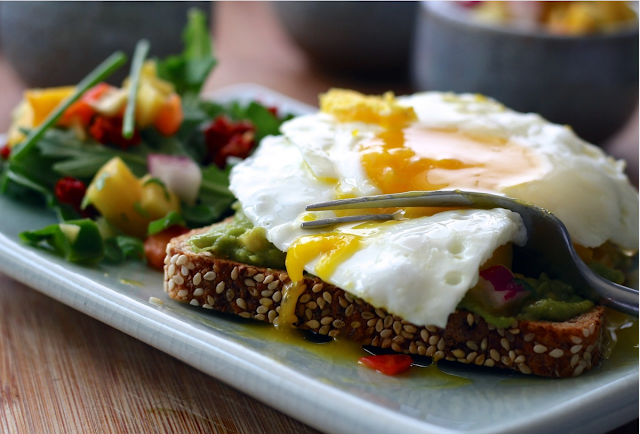
How to make Complete breakfast recipe step by step


how-to-make-complete-breakfast-recipe
Complete breakfast recipe

How to make Complete breakfast recipe step by step 


The concept of breakfast without the warm hot delicious eggs is incomplete. Complete breakfast recipe Eggs made with yogurt, onions and green peppers are a great addition to a hot meal and they are also very easy to cook. Eggs can be eaten at any time if they do not want to eat breakfast.
     Ingredients
  1. One egg,
  2. one onion
  3. one pinch of salt,
  4. green chilies,
  5. chopped one teaspoon
  6. half a teaspoon of coriander powder,
  7. one quarter teaspoon pepper
  8. FOR DOUGH
  9. A dessert tablespoon of medium size of flour
  10. Flour FOR FRYING
  11. Two tablespoons of tequila


    Method
In a large bowl, smash the eggs, add sliced ​​onions, sliced ​​green chilies, cilantro, red coriander, coriander and ground black pepper and stir well.
Now take a medium-sized dough and place it on a wooden plank and flatten it, then oil it, sprinkle some dry flour and form a loaf.
Now re-shape this saddle and shape it into a thorn.
Now pour the oil on a hot oven and pour the rolled flour on it. It is important to note that the parathas should be well cooked on both sides.
Now, with the help of a spoon spread the egg mixture on the flanks
Fry the egg yolk side well so that the egg does not remain raw.
Summer delicious egg prawns are ready. Please provide us with your valuable feedback in the box below.

How to successfully cook broccoli step by step?

how-to-successfully-cook-broccoli-step.
Broccoli  recipe


 How to successfully cook broccoli step by step?

Often shunned by children, broccoli is vegetables with many health benefits. So to avoid making an odd mistake when cooking them, and to reveal all their flavor, follow our advice!

The health benefits of broccoli are no longer to be proven. But to get the most out of this tasty vegetable, it's best to know how to cook it ... Learn how to choose, prepare and store broccoli by following these tips. You can serve the broccoli with roast pork or in a gratin.

To give you inspiration, discover our best broccoli recipes.


Fresh, how to choose and prepare broccoli?
Broccoli would reduce glucose production in addition to effectively fighting the onset of other diseases. The real gold mine of fibers, vitamins, and nutrients, it is too often shunned because of its strong odor. To choose it, favor compact broccoli buds, with a very firm stem and a fairly dark and uniform color. Broccoli, which turn yellow in color, are often already old. Their flowers begin to open and their taste, nutritional properties, and texture are altered. Check the base of the stem carefully: the stem should still be damp. If it is dry, it means that the vegetable was picked too long ago. If in doubt, you can seek advice from your scoop, who will guide you as best as possible.

To prepare a good little dish like a velouté of pear and broccoli, simply place the bouquets under water, dry them delicately in a clean cloth, then detail each bouquet by creating small "sous-bouquets".

In water, in a pan, roasts, fresh or frozen ... How to cook broccoli?
The cooking of broccoli plays a decisive role in the nutritional and taste qualities offered by the product. You can cook your broccoli in different ways:

steam for 5 minutes to make crisp, nicely green broccoli;
in boiling and salted water for 8 to 10 minutes to obtain tender broccoli;
in the microwave for 6 to 8 minutes if you are in a hurry, but this technique tends to alter the nutritional and taste qualities of the vegetable;
in the pan with a clove of garlic and olive oil for about 5 minutes to obtain a real pan-fried fresh broccoli;
in the oven for 20 minutes at 200 ° C for absolutely delicious and original roasted broccoli.
If you choose frozen broccoli, keep in mind that they have already been blanched before being packaged. This means that their cooking time will be slightly shorter. Frozen broccoli can be cooked in both water and steam, in the microwave, in the frying pan or in the oven.

Prepare the broccoli in advance

Broccoli can be stored relatively long in the refrigerator, and can, therefore, be prepared up to three days in advance. If you like to cook for several meals at the same time or if you don't have time to cook on the way home from work, preparing your broccoli a few days before eating them can be an excellent solution to continue eating healthy without getting tired.

Wash the broccoli, make small bouquets, and cook them using one of the methods described above. Season them with salt or pepper, then place them in an airtight container. Then keep them in the refrigerator for up to three days.

At the time of tasting, all you have to do is take the broccoli out of their box and reheat them in the pan or in the microwave.

How to store cooked broccoli?

Do you want to keep your cooked broccoli to eat in any season, or simply because you have prepared more than you need? Good news, several methods will allow you to keep them:

freezing: once cooked, dry your broccoli perfectly, then place them in a freezer bag for up to six months in the freezer;
Lacto-fermentation: just like cabbage, broccoli can be made into sauerkraut using mainly the stems;
in jars using only the tightest flowers: place the broccoli in a jar, add a spoonful of wine vinegar and 10 grams of salt, then sterilize.

Friday 31 January 2020

Salad recipes for lunch

Salad recipes for lunch


Salad recipes for lunch


Salad recipes for lunch, which is the first step of a healthy diet; It is offered with both meat and vegetable products. How about coloring your tables with salad varieties presented in different parts of the world? It is possible to have a light and balanced diet with salad recipes, which have become indispensable for diet lists. You can consume salad varieties with rich nutritional values ​​in between meals or main meals.

             Ingredients

  • 1 cup black quinoa
  • 1 small purple cabbage
  • 1 red onion
  • A few sprigs of parsley
  • A few sprigs of dill
  • 1 small bowl of walnut
  • 1 piece of chicken breast (Boiled and stewed)
  • For the sauce
  • 3 tablespoons of olive oil
  • 1 teaspoon of balsamic vinegar
  • 1 teaspoon pomegranate molasses

      Method

How to make winter salad with chicken
Boil the quinoa.
After peeling the red onion and chopping it as a dice, rub it with salt and remove the brackish water. Chop the greens. Chop the walnuts into the size of chickpeas at the most. Mix all the salad ingredients in a deep bowl.

Transfer all the ingredients to a small jar for the sauce. Cover the jar, shake the mixture well, and place it on the salad and mix.


Thursday 30 January 2020

Tasty recipe for kids cannelloni recipe

  Tasty recipe for kids cannelloni recipe
  A tasty recipe for kids cannelloni recipe


         Tasty recipe for kids cannelloni recipe

      A tasty recipe for kids' cannelloni recipe. A recipe with plenty of vegetables. friends this is an easy and children friendly recipe. My dear son thinks I actually make this recipe too little. Well, if this is not kid-proof then I don't know it anymore.

        INGREDIENTS

  • A dash of olive oil
  • 3 cloves of garlic, finely chopped
  • 2 cans of tomatoes, of 400 grams of good quality, eg Cirio
  • one full hand basil leaves (leaves separated from the stalks. Tear leaves finely and chops the stalks)
  • 600 grams of fresh spinach
  • A bowl of ricotta (250 grams)
  • 80 grams of pecorino (or parmesan) cheese, grated
  • 200 grams of crème Fraiche
  • 50 ml of water
  • 1 pack of chilled lasagna (12 sheets)

       Method

Preheat the oven to 180 degrees.
The sauce:
Put olive oil in a pan.
Add 1.5 cloves of finely chopped garlic, basil stalks and fry briefly.
Add the tomatoes and let it reduce to a thicker sauce.
Season with fresh pepper and salt and stir in the basil leaves.
The filling:
Put a dash of olive oil in a wok or large frying pan.
Add the remaining garlic and stir-fry the spinach. Drain.
Put the ricotta in a bowl and stir in the spinach.
Season with fresh pepper and salt.
The cannelloni:
Spoon about half of the tomato sauce over the bottom of a baking dish.
Cover all lasagna sheets with a strip of spinach-ricotta filling.
Roll the lasagne sheets and place them tightly next to each other in the baking dish.
Spoon the remaining tomato sauce over it.
In a bowl, stir the crème Fraiche smooth with half the pecorino.
Dilute with a little water to the desired thickness for the sauce.
You use approximately 50 ml of water for this.
Season with fresh pepper and salt and spread evenly over the tomato sauce.
Sprinkle with the rest of the cheese and bake the cannelloni until golden brown in about 25 minutes.
Enjoy!

       TIPS

With very small children it can be useful to first puree the spinach. Sometimes it is eaten better.

To make it extra easy, this vegetarian cannelloni recipe has also been made into a video recipe. You can view this here!

Prefer to make a cannelloni with meat? This with minced meat is a must!

Have you made this recipe? Then let me know how it went. 


Tuesday 28 January 2020

How to prepare Ginger tea and its benefits


How to prepare Ginger tea

How to prepare Ginger tea and its benefits


How to prepare ginger tea. Ginger has several therapeutic benefits, including a bactericidal, fungicidal, antioxidant, antiseptic and anti-inflammatory action. Ginger tea can be beneficial, in small amounts, to relieve nausea (including during pregnancy or chemotherapy), to aid digestion and to fight throat and respiratory diseases.

It also helps to prevent gastritis and ulcers, as it acts to fight the H. pylori bacteria, one of the main causes of the problem.

Ginger is known to be a thermogenic food, that is, it speeds up metabolism, increases body temperature and can help those who want to lose weight, but this benefit will only be noticed if combined with a healthy diet and physical exercise.


Ginger is found in fresh markets, preserves, in capsule, crystal or powder form. To make tea, it is best to use pure root. When buying, prefer it whole and fresh, with smoother skin, without holes, that is not withered or moldy. The inner part must be yellowish and not too fibrous.
What nutrients do you have?
Ginger is rich in copper, vitamins A, B, C and D, potassium, selenium, zinc, and magnesium. In the case of ginger tea, specifically, the benefits are also closely related to the release of the essential oils that are part of its composition: thymol, carvacrol, and eugenol.

These oils are mainly responsible for the anti-inflammatory action of ginger tea. That is, our body produces several inflammatory substances, such as oxytocins, but the essential oils of ginger can help inhibit inflammation. There are even animal studies that show its benefits for reducing joint inflammation related to arthritis.

For the stomach, mainly, studies show that it affects the adherence of the bacteria H. Pylori, which decreases the risk of developing gastritis, ulcers, and even stomach cancer in those who ingest it more frequently.

Note that the table of nutritional values below considers 100 grams of ginger, however, daily use cannot exceed 3 grams.
Benefits of ginger tea

Help with weight loss:


   Ginger tea is an ally for those who want to lose weight, since it is a thermogenic food, that is, it speeds up metabolism increases body temperature and ends up helping to lose weight. However, it is not enough to just drink ginger tea and expect significantly weight loss, its benefits will only be noticed if combined with a healthy diet and physical exercise.

It reduces nausea: Some studies have shown that ginger tea can help to reduce nausea after eating. When food does not "fall" well, it helps to decrease this feeling of poor digestion. However, if the cause of this nausea is a tumor, for example, it will not have this effect. By helping with digestion, its use is also related to the relief of gas symptoms.

It can also be used to reduce nausea in people undergoing chemotherapy or pregnant women, for example, but it is important to always talk to your doctor before starting to use tea in these situations.

Prevents ulcers and gastritis: As ginger tea helps fight H. pylori bacteria, one of the main causes of gastritis and stomach ulcers, it also helps to prevent diseases from happening. This mechanism happens as follows: the bacteria enter the human body through food and are fixed in the stomach, causing gastritis and ulcers. However, tea would decrease its adherence to the stomach, making it difficult for it to stick and to cause disease.

It can help in the prevention of cancers: Among the cancers that studies show that ginger and its tea can help prevent is stomach cancer, since it is related, in most cases, to changes caused by stomach ulcers. It also acts in the prevention of colon-rectal cancer, as it has a substance called 6-gingerol, which would prevent the development and proliferation of cancer cells in this region of the intestine. Animal studies also show a decreased risk of developing liver cancer.
Prevention of respiratory diseases: As ginger tea has an antioxidant action in the body, it acts in the prevention of flu and cold. It also has anti-inflammatory action, improving symptoms of cough and muscle pain and diseases such as asthma and bronchitis.

How to prepare ginger tea

In order for ginger tea to maintain its benefits, it is important not to boil the root with water. Tea should be prepared as follows:

Wash the ginger root thoroughly
Cut into small pieces or grate the root
Meanwhile, bring the water to high heat until it boils
Add the ginger to the water and cover the pan, lowering the heat slightly
Wait for 5 to 10 minutes to remove from the fire
Strain and serve.

How to consume ginger tea

The person should not consume more than three grams of ginger a day. These three grams can be divided into three or four cups of tea throughout the day, for example. But always be careful, since too much ginger tea can cause stomach irritation.

Monday 27 January 2020

How to cook French fries step by step

how-to-cook-french-fries

                                            How to cook French fries


                            How to cook French fries


       How to cook French fries at your home. You know friends there are infinite possibilities for the use of potatoes, surely the most delicious one is frying. We will show you the most classic one which provides potatoes cut into sticks. But the cuts are many and you can choose them according to the occasion. For example, to prepare the chips cut the peeled potatoes with a special wide blade grater set on the thinner thickness from which almost transparent slices are obtained.so read the whole recipe for this tasteful French fries.

 Ingredients for Crispy French Fries Recipe

·        Roast potatoes as much as you want
·        Oil to taste
·        Salt to taste

   Method

Cooking French Fries Recipe
Wash the potatoes under water, peel them and chop them.
Soak in water for 1 hour, stirring occasionally so that the starches come out.
Put the oil on your ceiling and heat it.
Strain the potatoes in a strainer and dry them with paper or kitchen towels.
Throw the potatoes in hot oil, after 5-6 minutes, remove the potatoes from the oil.
Let it stand on one side after the potatoes wait for 5-10 minutes, then turn the oil on the stove, add the salt to the oil, close to the browning.
When it comes to the desired consistency, remove it from the oil.
In this way, if you fry your potato, it will be crispy on the outside and soft on the inside.

I fried the potatoes in 2 ways, the yellow and yellow ones, as I described.
On the other plate are those that are fried without being taken out of normal oil.
I wanted to see the difference.

The choice is yours.

How to make French fries, who have not tried to make it at home before? If you are wondering, you can examine this recipe and try it at home.
What are the tips of the French fries’ recipe?
After slicing your potatoes, you should wait in the water to remove starch and not tarnish.
The oil that you will fry your potatoes should be angry.
Before you throw your potatoes into the hot oil, you should definitely dry them. If the water drips into the oil, your oil will burst and splash.
Baked French fries recipe;
Baked potato chips are a very suitable recipe for those who do not want to fry in large quantities. If you do not want to fry in the pan, you should try this method.
What goes to fries?
Meatballs will suit the most with the fries.
You can accompany the French fries with vegetables such as pepper.
It is very suitable for frying in pasta with sauce or baked pasta.
You can accompany the French fries with ketchup mayonnaise or a nice yogurt sauce.
How many calories are French fries?
1 medium portion of French fries corresponds to approximately 250 calories.

Tasty recipe for chicken


Tasty recipe for chicken
A tasty recipe for chicken


                   A tasty recipe for chicken

         Tasty recipe for chicken. Yes, dear friends. Chicken dishes that are popular in the world are suitable for every taste with their practical, nutritious and delicious flavors. Chicken recipes that can be easily prepared with the ingredients at home; It covers a large part of both the economic budget and healthy life.
Get ready to explore new tastes with the favorite recipes and go on the flavor journey with the most favorite recipes

Ingredients for Baked Chicken Recipe

  • 3 chicken breasts
  • 2 zucchini
  • 2 carrots
  • 10 cherry tomatoes
  • 10 pomegranate onions
  • 2 potatoes
  • 1 tea glass olive oil
  • 1 teaspoon black pepper
  • 3 cloves of garlic
  • 1 teaspoon ore
  • 100 grams of cheese
  • 1.5 tea glasses of water

Method for Baked Chicken Recipe


Make sure all the vegetables are fresh and get help from different spices to increase its flavor. The secret is to add the cheddar cheese at the last stage. If you add it in the first stage, it melts in cheddar cheese, it starts to harden and the taste is not what you expected. If you want the cheddar cheese to melt more nicely on your food, throw your grated cheddar cheese into the freezer. At the last stage, add it to your food and melt it gently. They will both be tastier and more deliciously melted.

Cooking Recommendation of Baked Chicken Recipe

If you wish, you can cook your food for a longer time at a lower temperature.
How to Make Baked Chicken Recipe?
Peel the skin of the potatoes and carrots and cut into cubes.
Chop the courgettes into thick cubes without peeling them.
Peel the shallots, remove the green stems of cherry tomatoes
Chop the chicken breasts into cubes.

Transfer all of them into glassware or ceramic ovenware. Put olive oil, salt, pepper, garlic, and thyme on it. Blend beautifully with your hands.
Add the water and cook it for 180 minutes at 180 degrees by covering it with aluminum foil or the lid of your container, if available.
Know cover and cook it for at least 6 minutes.
Take it out of the oven and sprinkle the grated cheddar cheese on it and cook again until the cheese melts and brownies.
Take it out of the oven and consume it warm.

If you want to prepare your guests unforgettable dinners, pamper yourself and consume low-calorie foods, you can find the best chicken dishes, practical cooking techniques and more here.

Saturday 25 January 2020

Easy recipe vanilla cake

easy-recipe-vanilla-cake
Easy recipe vanilla cake
     Easy recipe vanilla cake

 Vanilla cake a super-soft cake, easy to prepare and perfect for breakfast or for the whole family's snack. Do you know those cakes that I often enjoy making without this or without that? Here's forget it because this cake has everything it needs to have. I wanted to prepare a soft and very high cake to try to change the breakfast of our house where we all drink coffee in a rush eating maybe a biscuit or two and little else but it shouldn't have been too messy and I had to make it last at least a couple of days because we're out of everything the day and only at breakfast any cake would become dry. Well, do you want to know? I didn't have time to prepare it for Bugi which in a few minutes was already half a cake and after two hours it was finished. Oh well, we'll go back to cookies for tomorrow but I'll have to make another one very soon and I hope this time to be able to take it home! 

   Ingredients

  1. 250 g 00 flour
  2. 180 g sugar
  3. 180 g Butter
  4. 3 eggs
  5. 1 sachet Baking powder
  6. 1 vanilla bean

     Method

Divide the yolks from the whites.
Beat the egg whites until stiff steaks
Melt the butter and keep it aside.
 Put the yolks in a bowl together with the sugar and whip them with the electric whisk until they become frothy and whitish. Cut the vanilla pod with the tip of a small knife and extract the internal seeds. (keep the vanilla pod to flavor the milk for the PASTRY CREAM). Add the melted and cooled butter and continue to beat with the electric whisk for a few minutes.   Sift the flour and baking powder and add them to the rest of the ingredients. Finally, also, add the egg whites whipped with gentle movements and from the bottom up using a spatula. Pour the vanilla cake dough into a greased and floured or greased cake tin or with grease proof paper or with the release agent for baking pans and level the surface well.   Bake the vanilla cake in a preheated oven at 180 ° for 45 minutes until the cake is completely cooked and you have made the toothpick test. Remove the vanilla cake from the oven and let it cool completely. Once the cake is completely cold, you can sprinkle it with SAUCE SUGAR.   

VARIANTS AND ADVICE

 You can replace the butter with oil in the doses that you will find HERE. If you do not have the vanilla bean, you can replace it with a sachet of vanilla or a teaspoon of vanilla extract. 


      Storage


The vanilla cake is kept soft for two days covered with plastic wrap.


If you liked this recipe, you might also be interested in the Chocolate Cake or the birthday cake 


Easy recipe Mexican rice


easy-recipe-mexican-rice
Easy recipe Mexican rice


   Easy recipe Mexican rice

      Easy recipe Mexican rice is a popular side dish in Mexico combined with a staple and beans. You can make in different ways and we tell you the most popular one method and guide you step by step. Try to match the rice ingredients with what you make as the main dish. If you're serving chicken, Easy Mexican rice is perfect. If you serve beef, try Roasted Tomato Mexican Pilaf, prepared with steak juice.
An easy-to-make, spicy, delicious pilaf. For those who are looking for new flavors.
For more information about Mexican Rice please see Mexican Rice History.

      Ingredients
  • 1 tablespoon of olive oil
  • 1 spring onion finely chopped
  • 1 jalapeno pepper stalk is cut and the seeds are removed and thinly sliced
  • 2 cloves of garlic diced
  • 2 tablespoons of tomato paste
  • 1.5 cups long grain rice
  • 3 1/3 cups chicken broth (alternatively you can use vegetable broth) with little salt
  • 1 teaspoon salt
  • 1/4 teaspoon ground black pepper
  • 1/2 teaspoon chili pepper
  • 1/2 teaspoon powder cumin
  • 1/2 cup frozen peas thawed
  • 1/4 cup fresh coriander finely chopped
  • 2 teaspoons of lime (lime juice) freshly squeezed
  •  

       Method

1.   In a large frying pan or heat the rice pan and add olive oil. Heat it over medium-low heat.
2.   Add onion and jalapeno and cook, stirring constantly. You will cook for about 5 minutes until the onions soften and become transparent.
3.   Bring the bottom of the stove from the middle cut to medium temperature and add tomato paste, garlic, and rice. Know to cook it for three minutes.
4.   Add chicken broth, salt, pepper, chili pepper, and cumin; Bring the setting of the stove high and wait for it to boil.
5.   When it starts to boil, cut the bottom of the stove and close the lid of the pot. Allow it to cook inside for about 20 minutes until it draws the water.
6.   Add the peas, coriander and lime juice and mix well with rice, the final mixture is fluffy. Wait for a few minutes to drain the rice juice. It should have a steamed baked appearance. Taste the food and add salt, pepper and lime water if necessary.


        Key point

The amount of water may decrease or increase depending on the brand and type of rice you will use.


Wednesday 22 January 2020

How to make tea with milk easy and step by step

How-to-make-tea-with-milk-easy-and-step


How to make tea with milk easy and step by step 


If you thought that milk and tea could only be drunk together in the English way, then we have a 
pleasant surprise for you. Many cultures like milky tea and there are different ways to enjoy the combination. We tell you what the three most popular ways are.

Just like with coffee, chai latte is made with steamed milk. Use black tea for a classic taste. Do you want something more special? Then try earl gray tea bags for a softer taste. This is how you make it:
Put a teabag of your choice in a cup.
Know to boil the water and pour it on that cup.
Let the tea brew for at least 5 minutes for the best taste.
While you are making tea, heat half a cup of milk for 45 seconds in the microwave (the time depends on the power of your microwave) or in a pan until the milk starts steaming.
Pour the hot milk into a cup and use a milk frother for an extra airy froth effect. The ideal foam layer is just over an inch thick.
Remove the teabag from your cup and pour the milk into your tea.
 Know a little honey for the taste to get a good taste.
They are probably not wrong, those 65 million Britons who think there is only one way to drink a "real" cup of tea - and they think that is with milk. Moreover, it is super easy. You only need a kettle, a cup and 5 minutes, and then you just follow these simple steps.

Put a bag of tea in your favorite cup.
Bring water to the boil and pour it over the teabag.
Let the tea brew for 3 to 5 minutes without stirring or squeezing the bag.
Remove the tea bag and add a cloud of milk. Note: the milk is meant to improve the taste, so you just have to add a dash to make the tea creamier. If you use too much milk, you will no longer taste the tea. Look at the color of the drink while pouring. The idea is that you get a uniform brown color - a very light brown color means that there is too much milk in it.
Stir the milk evenly through your tea with a spoon.


In both recipes, you can use soy or almond milk instead of cow's milk.


SWEET MILK TEA


Lemon slices and ice cubes are certainly not the only way to enjoy iced tea. Have you ever tasted sweet milk tea? With delicious creamy milk, it is the ideal treat on a warm summer's day.

Follow the first 3 steps from the previous British milk tea recipe, but use two tea bags for a stronger tea flavor.
Season the tea with a cloud of condensed milk. Note: condensed milk is very fast, so don't use it too much.
Fill a glass for half or three quarters with ice cubes or shaved ice.
Fill the glass with tea and enjoy it immediately.


One last tip ... Add a pinch of nutmeg or cinnamon to these recipes to give your drink a spicy hue.

Monday 20 January 2020

How to cook chicken recipe with curry sauce

how-to-cook-chicken-recipe-with-curry
chicken recipe with curry sauce
     
      chicken recipe with curry sauce

     Today, I will tell you the chicken recipe with curry sauce, which is widely made and loved by everyone, a little different. Although the materials may seem a bit much, the construction is very simple and short. With this recipe, you can surprise your guests with the taste of curry chicken in a slightly more fine dining style rather than a classic house type.
               

                  Ingredients
 

              Chicken             For curry sauce;

  1. 200 ml coconut milk or 4 tablespoons yogurt
  2. 1 tablespoon curry powder
  3. Half a lemon
  4. 1 tablespoon balsamic vinegar
  5. 1 tsp red pepper
  6. Salt

         Chicken for marinating;

  1. Red powdered pepper
  2. Powdered chicken bouillon
  3. Salt
  4. Black pepper
  5. 2 tablespoons yogurt
  6. 1 teaspoon of honey
  7. Quarter of lemon
  8. Mint
  9. Olive oil

       To decorate;

  1. Cherry tomatoes
  2. Basil

      For rice;

  1. 1 cup of Jasmine rice
  2. 2 glasses of chicken broth

    Method

First, we put our rice in warm water and wait for 10 minutes. After that, fry in oil and add hot chicken broth or bouillon and cook. It will be ready in about 10 minutes. When the rice comes out of the holes, our rice is ready and we take it from the stove and let it rest.

While we are relaxing, we will marinate our chickens and start frying them in the pan. Red pepper powder, powdered chicken bouillon, salt, and pepper in a bowl, mix well on the chicken. Do not use mold bouillon here will be lumpy. The powder is available in large markets and you can marinate red meat with it before cooking. Then fry our chickens thoroughly in the pan.

We'il make our curry sauce while the chickens are fried. For this, coconut milk, which you can find in canned food in big markets, will give a very nice aroma. If you can't find it, you can do it with yogurt. Add 200 ml of coconut milk, 2 tablespoons of curry powder, 1 teaspoon of red powder pepper, half a lemon juice and 1 spoon of balsamic vinegar salt and mix well in a bowl.

We take the curry sauce into a new pan and throw the cooked chickens into it, boil the sauce and let the chickens eat the sauce thoroughly and continue cooking until the sauce comes to consistency.

Finally, we cut the mint in a very small way for the sauce and mix all the ingredients and the sauce is ready. You can do this on a food processor, but first, we need to mix the ingredients except for mint and add the last mint, so that the mint doesn't break up.

Finally, as a bonus to decorate under the tomatoes in the form of plus 2 scratches in boiling water for 10 seconds and let cold water. Then peel the shells up and peel the light olive oil with basil if you get a nice decor. In fact, if you dry them in the oven a little bit if possible you will get much better results.

Saturday 18 January 2020

Baked cheese cauliflower recipe

baked-cheese-cauliflower-recipe
baked cheese cauliflower recipe


  Baked cheese cauliflower recipe

A recipe that even people who say 'I don't like cauliflower very much, but I eat it' with a completely different tastes. Baked cauliflower with cheese in the oven! It emerges from the state of tomato paste and ground beef, which we all are accustomed to, with a very different flavor.

It is food thrown in our hearts with the benefits, it provides rather than the cauliflower taste. It contains active ingredients that fight against stomach ailments, cancer, and dry eyes. It is possible to see these benefits when eaten enough. But it is always worth consulting a doctor, let's not forget this.

Today, we put aside the prejudices against cauliflower and enjoy this flavor. We left the video below, we wish you good luck

       Ingredients 

  1. 100 grams powdered parmesan
  2. 800 grams cauliflower(boiled)
  3. 6 slices mozzarella cheese
  4. 150 grams grated cheddar cheese
  5. 1 cup of cream
  6. 150 grams of melted butter
  7. 2 cloves of garlic(crushed)
  8. 8 sprigs of fresh thyme(chopped)
  9. 2 teaspoons of salt
  10. 1 teaspoon of black pepper

         Method

  1. Mix melted butter, chopped fresh thyme, garlic and 1 teaspoon of salt in a bowl.
  2. Put half the boiled cauliflower into the heat-resistant container.
  3. Take a scoop of sauce and sauce the cauliflower.
  4. Sprinkle with powdered parmesan, mozzarella cheese and grated cheddar cheese all over the cauliflower.
  5. Pour 2/3 of the cream into the mold.
  6. After adding the remaining cauliflowers to your heat-resistant container, sprinkle with the rest of the powdered parmesan and cheddar cheese.
  7. After pouring the rest of the cream into the mold, sprinkle it with fresh thyme leaves.
  8. Bake in a 180-degree oven for 25 minutes until the cheese melts and brown and serve hot.

Tuesday 14 January 2020

How to make anchovy rice?


how-to-make-anchovy-rice
How to make anchovy rice

   How to make anchovy rice?
  
Hello to everyone! I'm here with a delicious recipe. Together, we will make anchovy rice.

Anchovy rice is an extremely tasty rice that is not as difficult as it seems. And I guess I don't know anyone who doesn't love him. If you make friends or something, everyone will want you to come home and cook!

In this recipe; first we start with the rice portion. While the rice is cooked, anchovies will slowly begin to set the pan.

Then we will meet the rice with anchovies in a baking dish and leave it to bake in the oven with a delicious pastry. When cooked; it will be a delicious meal with its smell, appearance and taste.

When your guests arrive, you can try my anchovy rice recipe if you want to prepare a meal that addresses both the eyes and the stomach. If you're ready, let's first take a look at the materials you need and then start making…

          Ingredients For rice

  1.  1 tablespoon butter
  2.  1 tablespoon olive oil
  3.  1 small onion                                                  
  4.  pine nuts
  5.  1 tablespoon of currants
  6.  allspice
  7.  1 cup of rice
  8.  1.5 glasses of water fresh dill

       Ingredients For anchovies

  1. 1 cup of corn flour
  2. 1 kg of anchovies

      Tip

If the dish you serve will be the same size as the cookware you cook, it will be much easier to turn it.

      Method

Take a pan of rice and open it underneath.
Take the butter and olive oil and add the finely chopped onion after the butter has melted.
Roast the onion until it turns color.
When the onion leaves itself, add the pine nuts and continue to roast.
Soak the bird grapes with hot water to soften, then strain the water and add it to the pot.
Add a little allspice and stir a little.
Wash long Baldo rice under cold water to get rid of excess starch and transfer it to the pot.
Roast rice with other ingredients.
Add salt and pepper and blend a little more.
Add the juice and mix everything again and let it boil.
When you see it boiling, turn it down, close the lid and cook for 8-10 minutes until it has drained.
After you see it cooked, open the lid and add fresh chopped dill and leave to infuse for 10-15 minutes.
Clean and wash anchovy.
Strain the water after washing.
Place a copper pot or ovenware on the counter.
Lubricate the gold to the edges along with olive oil.
Dip the anchovies in cornmeal and place the anchovies starting from the inside and rotating outwards.
When you have covered each side of the pan, then pass the edges again with anchovies to cover it.
After placing all of the anchovies, stir the infused rice well and leave over the anchovies.
Make sure to place the rice as high as possible.
Close the anchovies on the edge over the rice. This will make it stop all the more.
Continue placing the remaining anchovies with the skins on top and cover the rice.
Hover over some more olive oil. You can also apply a brush on anchovy.
Place the pan in the preheated oven at 180 degrees and cook for 20-25 minutes.
After removing from the oven, turn it to a service plate.
If your plate is the same size as the pot you use, it will be easier to turn.
Service Suggestion
Garnish with fresh onion and lemon slices and serve by slicing.

Monday 13 January 2020

Which Fish How to Cook fish cooking method

which-fish-how-to-cook-fish-cooking
Which Fish How to Cook fish cooking method

Which Fish How to Cook fish cooking method

How to make fish? How to cook fish in the oven? How to fry fish? Here are the answers to your questions about how to cook fish.
Fish is a food that people of all ages should consume. There are many benefits of the fish that should be on the tables at least 2 days a week. The fish, which is rich in omega-3, is preferred with its protective effect against cardiovascular diseases as well as the benefit of intelligence development especially in children. It is also an important nutritional source in terms of weight control as the fat content in fish is low. Fish with so many benefits should be on the nutrition list of adults as well as children.

Sardine, mackerel, anchovies, morino, salmon, pike, herring and sea bass are rich in calcium. Fish rich in omega-3; known as mackerel, tuna, sardines, salmon, anchovies and bluefish.

The fish season is different for each fish. Fish consumed during the season and months are much more delicious. It is also important how the fish is cooked as much as it is consumed at the right time. For this, fish cooking methods and which fish, how to cook is also useful to know.
 
Which Fish, How to Cook?
The most important point when cooking fish is to be able to cook without killing the protein. The fish can be cooked by frying or cooked in the oven or grill. Saute, boiled and steamed cooking methods are also highly preferred.

Oven Cooking
Oven cooking is a very common method. The fish to be cooked in the oven, olive oil and lemon mixture for a few hours to wait for the finishing is useful. Thyme or bay leaves can also be added as desired. The fish is baked in an oven heated to 200 degrees and placed on a tray with olive oil. Sliced ​​acorn, toric and peppers, tomatoes, onions, lemon slices and baked with plenty of parsley will be quite delicious.


Grill Cooking
While cooking, it is useful to choose big and oily fish in order not to stick to the grill. While cooking, the two sides of the fish should be drawn with a knife to avoid cracking. Grill cooking will be a very healthy method when white or black meat fish are preferred when they are fatty. Fish can be prevented from sticking by lubricating with oil before they are put on the grill. If it is to be cooked in a barbecue, the fire should not be too rich and the fish should be cooked far enough away from the fire.

Frying
Large fish should be sliced ​​and small fish should be fried whole. If the fish is floured, it will not stick to the pan and will be much more delicious. Small awned fish, fillet-extracted fish or bone-sliced ​​fish can be cooked in this way. With this cooking method, it is possible to get a more delicious result when the fish is low-fat or when it is applied to non-fat fish. It is very important to note that the fish does not draw fat while frying in the pan. Fish should be fried in hot oil and fast fire.

Roast
It is the preferred cooking method in a high-temperature oven without adding anything to the fish.

Saute
A pan with thick soles and non-stick coating should be preferred. It is a method of cooking fish fillets by rotating each side for 2 minutes after the inside of the ceiling is lightly oiled and well heated.

steamed
Steamed, made mostly from white meat fish, is a method of cooking fish on low heat or in the oven with the addition of water or tomatoes.

Tips for cooking fish
The fish to be fried should be cleaned and washed thoroughly and dried with paper towels.
2-3 hours before the fish is cooked, the onion juice and olive oil is put on the fish and cooked will be much more delicious.
The fish can be divided into pieces and the bottle can be passed. So it will cook much faster.
When the fish is cooked in a high-temperature oven without adding anything, if it is cooked correctly, the outer surface of the fish will be crispy and delicious, while the interior will be juicy and cooked.
When cooking fish, lemon and parsley put into the cooking tray will add flavor to the fish with its aroma.
Although it is not preferred to cook fish at home, especially to fry with the idea that it will smell, there is a method. Burning lemon peel on the cooker or boil vinegar in a coffee pot will be the solution to this problem.

Friday 10 January 2020

How to cook Delicious Turkish kabab the best method

how-to-cook-delicious-turkish-kabab
Delicious Turkish kabab

How to cook Delicious Turkish kabab the best method

If you are not from Manisa but you have once met the delicious taste of Manisa kebab, come closer. We know how long you've been wanting, but you can't eat.
It's time to do it with your own hands.

      Ingredients  


  1. 500 grams of meat
  2. 250 grams of lamb meat
  3. 3 tbsp gal flour
  4. 2 pieces dried onion
  5. 1,5 teaspoons
  6. 1 teaspoon black pepper
  7. 1 teaspoon cumin
  8. 1 piece of garlic
  9. 4 pieces of pita bread
  10. 1 sweet spoon butter
  11. 1 tablespoon of tomato paste
  12. 1 sweet spoon pepper paste
  13. 4 tablespoons
  14. 4 pieces of yogurt
  15. 4 pieces


Tip of Manisa Kebab Recipe

Kneading the meat for a long time and then resting will help you get more delicious meatballs.

     Method

You can cook your meatballs on the wire shelf of the oven and serve them with Ramadan pita.

How to Make Manisa Kebabı Recipe?
Sprinkle the onion and beat the garlic in the air.

Knead the ground beef with onion, garlic, breadcrumbs, and spices for at least 10 minutes.

Prepare the meatballs in thin, long strips with your hand and place them on a tray.

Let the meat rest in the refrigerator for 30-35 minutes to taste.

Cook the tasted meat at high temperatures in a well-heated cast iron pan. If you wish, you can add pepper and tomatoes at this stage.

Cook the tomato and pepper paste with water. Add the melted butter into it and remove it from the stove when it boils.

Heat the pita bread in a light buttery pan.

Apply a thin layer of yogurt with a knife. Pour the tomato paste sauce over the yogurt and place the meat. That's it, bon appetit!

How to make Complete breakfast recipe step by step


how-to-make-complete-breakfast-recipe
Complete breakfast recipe

How to make Complete breakfast recipe step by step 


The concept of breakfast without the warm hot delicious eggs is incomplete. Complete breakfast recipe Eggs made with yogurt, onions and green peppers are a great addition to a hot meal and they are also very easy to cook. Eggs can be eaten at any time if they do not want to eat breakfast.
     Ingredients
  1. One egg,
  2. one onion
  3. one pinch of salt,
  4. green chilies,
  5. chopped one teaspoon
  6. half a teaspoon of coriander powder,
  7. one quarter teaspoon pepper
  8. FOR DOUGH
  9. A dessert tablespoon of medium size of flour
  10. Flour FOR FRYING
  11. Two tablespoons of tequila


    Method
In a large bowl, smash the eggs, add sliced ​​onions, sliced ​​green chilies, cilantro, red coriander, coriander and ground black pepper and stir well.
Now take a medium-sized dough and place it on a wooden plank and flatten it, then oil it, sprinkle some dry flour and form a loaf.
Now re-shape this saddle and shape it into a thorn.
Now pour the oil on a hot oven and pour the rolled flour on it. It is important to note that the parathas should be well cooked on both sides.
Now, with the help of a spoon spread the egg mixture on the flanks
Fry the egg yolk side well so that the egg does not remain raw.
Summer delicious egg prawns are ready. Please provide us with your valuable feedback in the box below.

Thursday 9 January 2020

How to successfully cook broccoli step by step?

how-to-successfully-cook-broccoli-step.
Broccoli  recipe


 How to successfully cook broccoli step by step?

Often shunned by children, broccoli is vegetables with many health benefits. So to avoid making an odd mistake when cooking them, and to reveal all their flavor, follow our advice!

The health benefits of broccoli are no longer to be proven. But to get the most out of this tasty vegetable, it's best to know how to cook it ... Learn how to choose, prepare and store broccoli by following these tips. You can serve the broccoli with roast pork or in a gratin.

To give you inspiration, discover our best broccoli recipes.


Fresh, how to choose and prepare broccoli?
Broccoli would reduce glucose production in addition to effectively fighting the onset of other diseases. The real gold mine of fibers, vitamins, and nutrients, it is too often shunned because of its strong odor. To choose it, favor compact broccoli buds, with a very firm stem and a fairly dark and uniform color. Broccoli, which turn yellow in color, are often already old. Their flowers begin to open and their taste, nutritional properties, and texture are altered. Check the base of the stem carefully: the stem should still be damp. If it is dry, it means that the vegetable was picked too long ago. If in doubt, you can seek advice from your scoop, who will guide you as best as possible.

To prepare a good little dish like a velouté of pear and broccoli, simply place the bouquets under water, dry them delicately in a clean cloth, then detail each bouquet by creating small "sous-bouquets".

In water, in a pan, roasts, fresh or frozen ... How to cook broccoli?
The cooking of broccoli plays a decisive role in the nutritional and taste qualities offered by the product. You can cook your broccoli in different ways:

steam for 5 minutes to make crisp, nicely green broccoli;
in boiling and salted water for 8 to 10 minutes to obtain tender broccoli;
in the microwave for 6 to 8 minutes if you are in a hurry, but this technique tends to alter the nutritional and taste qualities of the vegetable;
in the pan with a clove of garlic and olive oil for about 5 minutes to obtain a real pan-fried fresh broccoli;
in the oven for 20 minutes at 200 ° C for absolutely delicious and original roasted broccoli.
If you choose frozen broccoli, keep in mind that they have already been blanched before being packaged. This means that their cooking time will be slightly shorter. Frozen broccoli can be cooked in both water and steam, in the microwave, in the frying pan or in the oven.

Prepare the broccoli in advance

Broccoli can be stored relatively long in the refrigerator, and can, therefore, be prepared up to three days in advance. If you like to cook for several meals at the same time or if you don't have time to cook on the way home from work, preparing your broccoli a few days before eating them can be an excellent solution to continue eating healthy without getting tired.

Wash the broccoli, make small bouquets, and cook them using one of the methods described above. Season them with salt or pepper, then place them in an airtight container. Then keep them in the refrigerator for up to three days.

At the time of tasting, all you have to do is take the broccoli out of their box and reheat them in the pan or in the microwave.

How to store cooked broccoli?

Do you want to keep your cooked broccoli to eat in any season, or simply because you have prepared more than you need? Good news, several methods will allow you to keep them:

freezing: once cooked, dry your broccoli perfectly, then place them in a freezer bag for up to six months in the freezer;
Lacto-fermentation: just like cabbage, broccoli can be made into sauerkraut using mainly the stems;
in jars using only the tightest flowers: place the broccoli in a jar, add a spoonful of wine vinegar and 10 grams of salt, then sterilize.

Follow me