TOMATO CHUTNEY RECIPE WITH GINGER AND GARLIC

TOMATO CHUTNEY RECIPE

TOMATO CHUTNEY RECIPE WITH GINGER AND GARLIC


Recipe for a tomato chutney with ginger and garlic.
This deliciously sweet, syrupy tomato chutney with ginger and garlic. Oops! That's good. That is why I immediately share this recipe with you today. If you already make this chutney and keep it in the fridge, I will soon have a delicious vegan/vegan vegetable wrap for you. And I want to tell you that you want to taste it!

RECIPE TOMATO CHUTNEY WITH GINGER AND GARLIC

1 jar of tomato chutney - preparation time: 5 minutes - cooking time: 40 minutes


             INGREDIENTS


  • 6 vine tomatoes washed and dried
  • 1 clove of garlic, peeled and chopped
  • 1.5 cm ginger, peeled and chopped
  • Black pepper and sea salt
  • 2 tablespoons dark brown caster sugar
  • 1 teaspoon of balsamic vinegar
  • Extra: a clean (sterilized) jar of about 270 grams

      INSTRUCTIONS FOR PREPARATION 

Preheat the oven to 180 degrees.
Cut the tomatoes into quarters and place them on a baking tray lined with baking paper.
Pour a generous splash of olive oil over the tomatoes and place the oven tray in the preheated oven for about 20 minutes. Then spoon the tomatoes and roast for another 10 minutes.
Meanwhile, put a skillet on the stove and pour some olive oil into the pan. And take garlic and ginger in this and fry it.
Spoon the tomatoes from the baking tray into the frying pan and do not forget to add the released moisture.
Add the two tablespoons of dark brown caster sugar and let the tomato chutney reduce until you can no longer recognize the tomatoes as such and the sauce is thick.
Season the tomato chutney with salt and pepper and pour in the balsamic vinegar.
Spoon the chutney into the jar and screw on the lid. Turn the pot upside down and let it cool completely. Then place in the refrigerator.
Enjoy!


TIPS: The above recipe is a basic recipe for me. Since I like to eat this tomato chutney with dishes that have turmeric, cumin or paprika powder added to it, I like to keep the chutney simple. But of course, you can add a number of other flavors while adding garlic and ginger for more flavor. A shallot is also delicious, a finely chopped red pepper, a pinch of cinnamon or just taste like cumin. For example, take a look at my spicy pumpkin chutney with apple.


Did you make this tomato chutney too? Please let me know in a comment below how it went. if you made one of my recipes. Then I can see what is already being made of my recipes, I like that!
So please like, share and comment below.

             Thank you for Reading.


How to cook turnips? Easy and Step by Step Method

How to cook turnips
How to cook turnips

How to cook turnips?

The turnip is a root vegetable of the Brassicaceae family that can be eaten whole or in pieces, alone or combined with other vegetables for baking. The yellow turnip (also called the gold ball) and the new turnip (or early) will be sweeter. For a more pungent flesh and taste, prefer the white and purple turnip. But how do you cook the water-rich turnip so it's not too bland? You can prepare it with steam, boiling water or in the pan. Then taste it in salads, mashed potatoes or even soups with toasted hazelnuts.

Steaming turnips

To preserve the vitamins and mineral salts of the turnip, prefer steaming. Brush your turnips underwater to remove earthy particles. Just cut the tops and rootlets (small roots) of the new turnips. Peel the other kinds of turnips. Otherwise, cut them into pieces. Fill the water compartment of your steamer. Place the turnips in the appropriate basket. Cook for 8 to 10 minutes in a steamer. If you are using a pressure cooker, place the turnips in the steam basket. Pour a bottom of the water in the casserole. Count 6 to 8 minutes of cooking with a pressure cooker from the whistling of the valve.

Cooking turnips with water

Cook your turnips in boiling water very easily. Wash them under clear water. If you've chosen new turnips, just brush them. Otherwise, peel your turnips carefully with a peeler. Cut the rootlets and the tops. Cut your turnips into cubes. In a large Dutch oven or large saucepan, bring a large volume of salted water to a boil. At the first broths, throw in the turnips. Then count 20 to 25 minutes of cooking time, depending on the size of the cubes. Check the doneness by planting the tip of a knife in the turnips, if it sinks easily, they are cooked!

You can dilute a chicken broth in your water and add carrots, leeks, celery, potatoes for a delicious soup that you will only have to mix.

Cooking turnips in the pan

By favoring cooking in a pan, you will gently caramelize your turnips which will then have a little sweet taste. Start by washing the turnips. Then cut the rootlets (small roots) and leaves. Peel them with a paring knife. If you opt for new turnips, simply brush them under clean water. Also keep their leaves which will decorate a soup. Cut your turnips into small cubes. In a large skillet or wok, melt a knob of butter. Brown the diced turnips for 5 minutes. Add a large tablespoon of honey or soy sauce and continue cooking for 5 minutes. The turnips will caramelize and become tender. Enjoy them immediately.


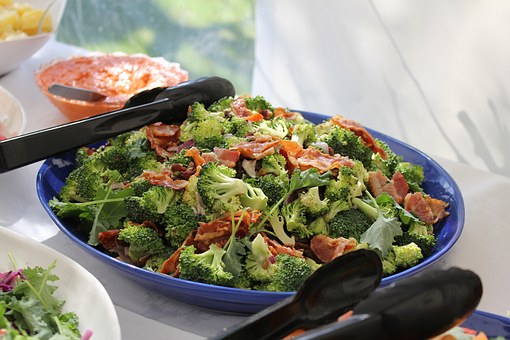
Broccoli Salad for All Taste easy step by step

Broccoli Salad for All Taste


Broccoli Salad for All Taste


Broccoli Salad for All Taste, Broccoli cabbage tastes delicious and surpasses the nutrient content of many vegetables.
The constant the texture of the vegetable, the unobtrusive taste, the high protein content combined with the low fiber content that gave her the right to call nutritional product broccoli.
After heat treatment, it tastes like green asparagus to taste, and has another name - "Asparagus cabbage".
It gives a great number of dishes a special flavor and a pleasant crunch. One of them is given in this article. The article describes many options for how to cook delicious broccoli salads.
 Broccoli Salad for All Taste

        Ingredients

  • 400 g broccoli
  • 100 g Bulgarian pepper
  • 150 g carrot
  • 3 tbsp. l vegetable oil
  • the bottom of the dill
  • ½ tbsp. l coriander
  • 50 ml of vinegar
  • 3 garlic cloves
  • 1 tsp salt
  • 1/3 tsp ground black pepper
  • 1 tsp sugar
  • 1/3 tsp ground red pepper

        Method


3-5 minutes’ cook broccoli. Fill with cold water.
Rub on carrot, pepper, cut in half rings, garlic chips and dill.
Take a bowl, mix cabbage, carrots, peppers, garlic, and dill.
Sprinkle with sugar, salt, black, and red pepper and coriander.
Pour vinegar and vegetable oil.
Bring brew for two hours.
 Broccoli Salad for All Taste

How to make sour lemon pickles Easy Method


How to make sour lemon pickles Easy Method
How to make sour lemon pickles

How to make sour lemon pickles

Lemon pickles Easy Method. Lemon juice is enough to fill the glass
Eating pickles are associated with many foods. Especially if it is traditional foods.

 We usually use pickles instead of yogurt and salads. Many housewives are keen to make pickles and try to pick the latest and most special pickles.

From well-known pickles such as seven-pickled pickles and pickled pickles to special pickles such as pickled green beans attract all sorts of ladies, and those who make pickles pick at least one of these pickles each year. And they do it.

Depending on what they are made with, pickles have different flavors and their sourness varies. Pickled garlic, for example, tastes less picky than a pickled gourd.

 Since there are so many sour pickles, today we are going to teach you the sourest pickles. Are we even sour than lemon? Have you ever thought that sour lemons can also be sour? Yes, it can! You can make sour lemon with sour lemon and another sour lemon sour.

 Of course, how to make a sour lemon slightly different. For example, some make this pickle with chopped celery. Even the sour lemon pickles are different. Some lemons curl sours and some four wedges.

If the size of a sour lemon is too small, they will even throw it right! We've selected the easiest and most common recipe from the sour pickles to show you. If you're also into making and eating infinitely sour pickles, don't miss the sour lemon pickle:

Ingredients for a pickled lemon sour


  • Lemon sour 1 kg
  • Salt 1 tbsp
  • Pepper as desired

      How to make sour lemon pickles


  • Wash lemons and let them dry completely.

  • Cut the sour lemon as desired (such as the curl) and make sure to cut off all its cores so that the sour is not bitter.

  • Fill a large bowl with salt and red pepper. Put the lemon rings or slices in the salt and pepper mixture and sprinkle on them.


2. Lemon sour layer on top of the glass and fill it.


2. Take fresh sour lemon juice and pour on lemons and fill in a glass. So that it completely covered the lemons.


2. Lemon sour wrap in a sour jar and keep it in the sun. And after a couple of weeks, eat with your favorite food.

Key Points How to Make Sour Lemon Pickles


You can use sour lemons in four slices, eight slices, rings, thin slices or even sour lemons right. Many people usually prefer sour lemon rings as a ring.

You can use a little bit of tomato or turmeric powder in your pickle to make it taste special and change the color slightly.


They usually use sour lemon juice for pickling, and vinegar is not recommended for sour lettuce.

Pickled lemon sour needs a lot of sun and heat. Put it in the hot sun for action.

Don't get sour lemon skin at all. Just remove the cores.

 Pickled lemon sour does not need to be refrigerated and can be stored indoors.

 In some recipes, lemons do not add lemon juice or vinegar to sours. Because by placing the lemon squeeze glass in the sun, the lemons themselves throw water.

 When preparing sour lemon sour depends on the size of the sour lemon. If the sour lemon skin is thin, you can eat it after 4 weeks of sun exposure.

Never open sour jars before changing the color of lemons and pickles. Be sure to store it in the fridge after opening it in pickles.

 You can pour a tablespoon of olive oil into the jar to improve the sour taste of the lemon.

  Some recipes use lemon juice instead of fresh lemon.

                                       Thanks for reading


Sunday, 22 March 2020

TOMATO CHUTNEY RECIPE WITH GINGER AND GARLIC

TOMATO CHUTNEY RECIPE

TOMATO CHUTNEY RECIPE WITH GINGER AND GARLIC


Recipe for a tomato chutney with ginger and garlic.
This deliciously sweet, syrupy tomato chutney with ginger and garlic. Oops! That's good. That is why I immediately share this recipe with you today. If you already make this chutney and keep it in the fridge, I will soon have a delicious vegan/vegan vegetable wrap for you. And I want to tell you that you want to taste it!

RECIPE TOMATO CHUTNEY WITH GINGER AND GARLIC

1 jar of tomato chutney - preparation time: 5 minutes - cooking time: 40 minutes


             INGREDIENTS


  • 6 vine tomatoes washed and dried
  • 1 clove of garlic, peeled and chopped
  • 1.5 cm ginger, peeled and chopped
  • Black pepper and sea salt
  • 2 tablespoons dark brown caster sugar
  • 1 teaspoon of balsamic vinegar
  • Extra: a clean (sterilized) jar of about 270 grams

      INSTRUCTIONS FOR PREPARATION 

Preheat the oven to 180 degrees.
Cut the tomatoes into quarters and place them on a baking tray lined with baking paper.
Pour a generous splash of olive oil over the tomatoes and place the oven tray in the preheated oven for about 20 minutes. Then spoon the tomatoes and roast for another 10 minutes.
Meanwhile, put a skillet on the stove and pour some olive oil into the pan. And take garlic and ginger in this and fry it.
Spoon the tomatoes from the baking tray into the frying pan and do not forget to add the released moisture.
Add the two tablespoons of dark brown caster sugar and let the tomato chutney reduce until you can no longer recognize the tomatoes as such and the sauce is thick.
Season the tomato chutney with salt and pepper and pour in the balsamic vinegar.
Spoon the chutney into the jar and screw on the lid. Turn the pot upside down and let it cool completely. Then place in the refrigerator.
Enjoy!


TIPS: The above recipe is a basic recipe for me. Since I like to eat this tomato chutney with dishes that have turmeric, cumin or paprika powder added to it, I like to keep the chutney simple. But of course, you can add a number of other flavors while adding garlic and ginger for more flavor. A shallot is also delicious, a finely chopped red pepper, a pinch of cinnamon or just taste like cumin. For example, take a look at my spicy pumpkin chutney with apple.


Did you make this tomato chutney too? Please let me know in a comment below how it went. if you made one of my recipes. Then I can see what is already being made of my recipes, I like that!
So please like, share and comment below.

             Thank you for Reading.


Saturday, 21 March 2020

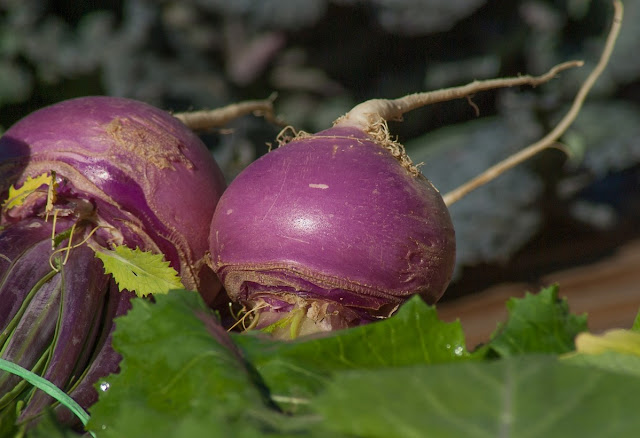
How to cook turnips? Easy and Step by Step Method

How to cook turnips
How to cook turnips

How to cook turnips?

The turnip is a root vegetable of the Brassicaceae family that can be eaten whole or in pieces, alone or combined with other vegetables for baking. The yellow turnip (also called the gold ball) and the new turnip (or early) will be sweeter. For a more pungent flesh and taste, prefer the white and purple turnip. But how do you cook the water-rich turnip so it's not too bland? You can prepare it with steam, boiling water or in the pan. Then taste it in salads, mashed potatoes or even soups with toasted hazelnuts.

Steaming turnips

To preserve the vitamins and mineral salts of the turnip, prefer steaming. Brush your turnips underwater to remove earthy particles. Just cut the tops and rootlets (small roots) of the new turnips. Peel the other kinds of turnips. Otherwise, cut them into pieces. Fill the water compartment of your steamer. Place the turnips in the appropriate basket. Cook for 8 to 10 minutes in a steamer. If you are using a pressure cooker, place the turnips in the steam basket. Pour a bottom of the water in the casserole. Count 6 to 8 minutes of cooking with a pressure cooker from the whistling of the valve.

Cooking turnips with water

Cook your turnips in boiling water very easily. Wash them under clear water. If you've chosen new turnips, just brush them. Otherwise, peel your turnips carefully with a peeler. Cut the rootlets and the tops. Cut your turnips into cubes. In a large Dutch oven or large saucepan, bring a large volume of salted water to a boil. At the first broths, throw in the turnips. Then count 20 to 25 minutes of cooking time, depending on the size of the cubes. Check the doneness by planting the tip of a knife in the turnips, if it sinks easily, they are cooked!

You can dilute a chicken broth in your water and add carrots, leeks, celery, potatoes for a delicious soup that you will only have to mix.

Cooking turnips in the pan

By favoring cooking in a pan, you will gently caramelize your turnips which will then have a little sweet taste. Start by washing the turnips. Then cut the rootlets (small roots) and leaves. Peel them with a paring knife. If you opt for new turnips, simply brush them under clean water. Also keep their leaves which will decorate a soup. Cut your turnips into small cubes. In a large skillet or wok, melt a knob of butter. Brown the diced turnips for 5 minutes. Add a large tablespoon of honey or soy sauce and continue cooking for 5 minutes. The turnips will caramelize and become tender. Enjoy them immediately.


Friday, 20 March 2020

Broccoli Salad for All Taste easy step by step

Broccoli Salad for All Taste


Broccoli Salad for All Taste


Broccoli Salad for All Taste, Broccoli cabbage tastes delicious and surpasses the nutrient content of many vegetables.
The constant the texture of the vegetable, the unobtrusive taste, the high protein content combined with the low fiber content that gave her the right to call nutritional product broccoli.
After heat treatment, it tastes like green asparagus to taste, and has another name - "Asparagus cabbage".
It gives a great number of dishes a special flavor and a pleasant crunch. One of them is given in this article. The article describes many options for how to cook delicious broccoli salads.
 Broccoli Salad for All Taste

        Ingredients

  • 400 g broccoli
  • 100 g Bulgarian pepper
  • 150 g carrot
  • 3 tbsp. l vegetable oil
  • the bottom of the dill
  • ½ tbsp. l coriander
  • 50 ml of vinegar
  • 3 garlic cloves
  • 1 tsp salt
  • 1/3 tsp ground black pepper
  • 1 tsp sugar
  • 1/3 tsp ground red pepper

        Method


3-5 minutes’ cook broccoli. Fill with cold water.
Rub on carrot, pepper, cut in half rings, garlic chips and dill.
Take a bowl, mix cabbage, carrots, peppers, garlic, and dill.
Sprinkle with sugar, salt, black, and red pepper and coriander.
Pour vinegar and vegetable oil.
Bring brew for two hours.
 Broccoli Salad for All Taste

Thursday, 19 March 2020

How to make sour lemon pickles Easy Method


How to make sour lemon pickles Easy Method
How to make sour lemon pickles

How to make sour lemon pickles

Lemon pickles Easy Method. Lemon juice is enough to fill the glass
Eating pickles are associated with many foods. Especially if it is traditional foods.

 We usually use pickles instead of yogurt and salads. Many housewives are keen to make pickles and try to pick the latest and most special pickles.

From well-known pickles such as seven-pickled pickles and pickled pickles to special pickles such as pickled green beans attract all sorts of ladies, and those who make pickles pick at least one of these pickles each year. And they do it.

Depending on what they are made with, pickles have different flavors and their sourness varies. Pickled garlic, for example, tastes less picky than a pickled gourd.

 Since there are so many sour pickles, today we are going to teach you the sourest pickles. Are we even sour than lemon? Have you ever thought that sour lemons can also be sour? Yes, it can! You can make sour lemon with sour lemon and another sour lemon sour.

 Of course, how to make a sour lemon slightly different. For example, some make this pickle with chopped celery. Even the sour lemon pickles are different. Some lemons curl sours and some four wedges.

If the size of a sour lemon is too small, they will even throw it right! We've selected the easiest and most common recipe from the sour pickles to show you. If you're also into making and eating infinitely sour pickles, don't miss the sour lemon pickle:

Ingredients for a pickled lemon sour


  • Lemon sour 1 kg
  • Salt 1 tbsp
  • Pepper as desired

      How to make sour lemon pickles


  • Wash lemons and let them dry completely.

  • Cut the sour lemon as desired (such as the curl) and make sure to cut off all its cores so that the sour is not bitter.

  • Fill a large bowl with salt and red pepper. Put the lemon rings or slices in the salt and pepper mixture and sprinkle on them.


2. Lemon sour layer on top of the glass and fill it.


2. Take fresh sour lemon juice and pour on lemons and fill in a glass. So that it completely covered the lemons.


2. Lemon sour wrap in a sour jar and keep it in the sun. And after a couple of weeks, eat with your favorite food.

Key Points How to Make Sour Lemon Pickles


You can use sour lemons in four slices, eight slices, rings, thin slices or even sour lemons right. Many people usually prefer sour lemon rings as a ring.

You can use a little bit of tomato or turmeric powder in your pickle to make it taste special and change the color slightly.


They usually use sour lemon juice for pickling, and vinegar is not recommended for sour lettuce.

Pickled lemon sour needs a lot of sun and heat. Put it in the hot sun for action.

Don't get sour lemon skin at all. Just remove the cores.

 Pickled lemon sour does not need to be refrigerated and can be stored indoors.

 In some recipes, lemons do not add lemon juice or vinegar to sours. Because by placing the lemon squeeze glass in the sun, the lemons themselves throw water.

 When preparing sour lemon sour depends on the size of the sour lemon. If the sour lemon skin is thin, you can eat it after 4 weeks of sun exposure.

Never open sour jars before changing the color of lemons and pickles. Be sure to store it in the fridge after opening it in pickles.

 You can pour a tablespoon of olive oil into the jar to improve the sour taste of the lemon.

  Some recipes use lemon juice instead of fresh lemon.

                                       Thanks for reading


Follow me